SILKSCREEN PRINTING METHOD
Nothing feels more satisfying than looking and having your own unique or favourite design printed on a T-shirt. Be it something adorable, stylish or classy, every print has their own little backstory of how they’re made. In case you’re planning to produce your own line of eye-grabbing t-shirts or just searching t-shirt printing out of curiosity, we have something in store for you.
- Silkscreen Printing
Probably the most preferred method in t-shirt printing. If you have printed shirt which remains vibrant, soft, smooth for long, chances are it is done by silkscreen printing.
So, what exactly is silkscreen printing? Remember how we used stencils to draw various shapes like stars, heart shapes and even letters? The silkscreen technique uses the same concept, just using ink as your “pencil” to draw the shape.

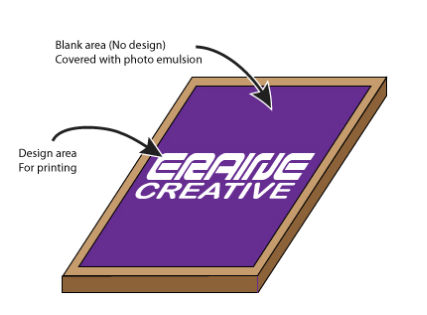
But of course, the stencil used in silkscreen, it is not the same as the one shown above. The stencil used consists of a nylon mesh held over an aluminium or wooden frame. Nylon mesh on stencil will have your desired design on it (example shown below), covering (with photographic emulsion) parts of the mesh screen where you do not want ink to seep through and leaving design area parts uncovered to allow ink to seep through the tiny holes in the mesh, which forms your ink printed t-shirts.

CREATING THE SCREEN STENCIL
To create the design area for printing on the nylon mesh stencil, we will first need to cover the mesh screen with photographic emulsion (purple parts shown in example). Photographic emulsion is a light-sensitive colloid used in film-based photography.
A positive film or a transparency film with your design printed in black will have to be placed on to the stencil. Design printed on the film will be exactly how your stencil will turn out and in this case, exactly how your shirt prints will look.
Once the film is nicely placed on the stencil, The stencil will be placed into an exposure unit where the stencil will be exposed to UV light. This process usually takes up to a few minutes, depending on the amount of UV your light bulb is able to produce. After exposure, the stencil will be washed out preferably by a jet-spray and your design area will be revealed on the screen, not covered by photo emulsion.

PRESSING THE INK ONTO THE T SHIRT
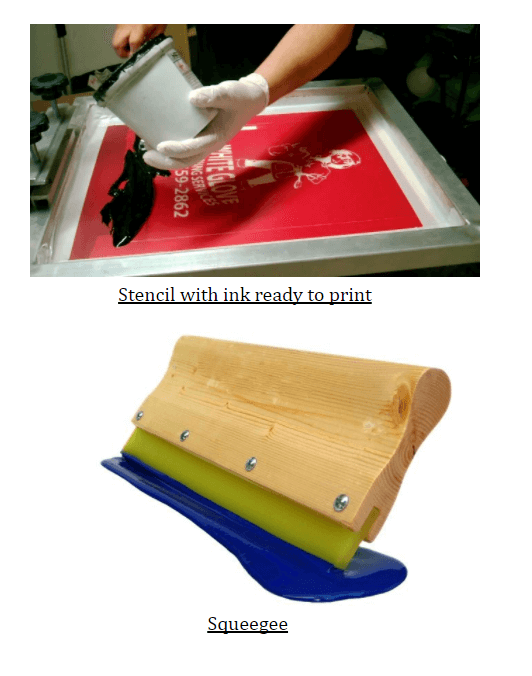
Once preparation for stencil done, it is where the work starts. Ready stencil will be placed above your T-shirt print area. Now you need to flood some ink onto the screen, and then use a squeegee (picture below) to press down and ensure that the ink spreads all over your screen. Excess ink will be wiped away. And the screen is finally taken off with the design you’re printing- it’s cured, dried and that’s it!
You might be curious as to silkscreen printing designs of multiple colours. Multiple colour designs can be done by seperating the different colours of your design onto one screen. For example , a red, blue and green (3 colour) design will have red parts of the design on a screen, blue parts on another and lastly green parts on a screen. Each layer of colour will be done individually with precision in film preparation and printing.

